Office 365 & Azure Active Directory
The first thing that may not be obvious at first is that Office 365 uses Azure Active Directory to manage users. Because of this, any documentation referring to authentication with Azure Active Directory (AAD) pertains to Office 365 authentication.These were the closest references I could find that eventually got me going, but they are against the old portal and using Azure not Office 365. I couldn't find anything that showed how to do it via Office 365.
Register the Application
As with all the tutorials, let us start by registering the application in Office 365. To do this, we'll need to get into AAD associated with the Office 365 subscription.One way to do this...
-
Login to Office 365

-
Go to admin portal
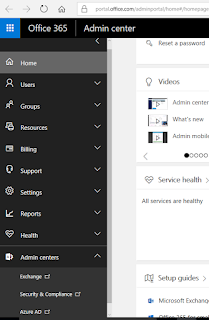
- From the navigation, expand Admin Centers and select Azure AD


App Registration
From the Azure Active Directory dashboard, pick App Registrations if it is visible in the left navigation, otherwise expand more services and select it there. You can star it to add to the left navigation if you want.
New application registration
From the App Registrations blade, select New application registration. Provide a meaningful name for the application. You can enter the site's production url (note: make sure to prefix https:// if your site is secure) here with the suffix.auth/login/aad/callback to help fill in the next blades. Tab out of the field to enable the Create button. Click it and select the newly created application.

Reply Urls
The Sign-on URL provided during creation is automatically added to the Reply URLs for this application. One of the nice things about the registration is that we can specify multiple reply urls that are valid for this application. This allows us to specify staging, uat, testing, development urls that can all share this authentication (of course, be smart about it). Go ahead and add any you want now. You can always add more later.
Api Access Key (Client Secret)
Now select the Keys tab to create a key that our web app can use to identify itself to AAD. Enter a name for the token and select a duration for which the token will be valid. After saving, the secret will be shown. Make sure to grab it right away and save it somewhere safe. It will not be visible once you close that blade. This will be used as the client secret when enabling authentication.
App Service Authentication
Because I simply needed to know if the user is in my active directory and nothing else, App Service Authentication is the simplest way to get this going (of course, after hours of hair pulling due to lack of documentation; but now it's a breeze for future sites :D ).Enable Authentication
Pick the Authentication / Authorization menu item and turn on App Service Authentication. Then select "Login with Azure Active Directory" from the "Action to take when request is not authenticated" dropdown.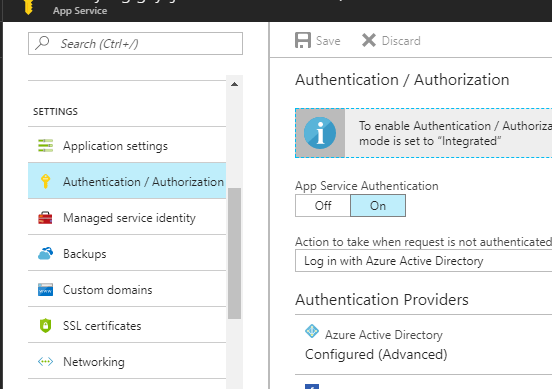
Advanced Configuration
From the listed Authentication Providers, select Azure Active Directory. For the management mode, select Advanced. For the client ID, enter in the Application ID of the newly registered application.
Issuer Url
This was by far the most annoyingly difficult piece to figure out. It will behttps://login.microsoftonline.com/{tenant-id} where {tenant-id} is the directory id. To get this url, go back to Office 365 App Registrations, and select the Endpoints top menu item. Copy any of the endpoints and delete everything past your tenant-id, which will be a GUID. (Ex, https://login.microsoftonline.com/xxxxxxxx-eeee-4b8a-a886-xxxd4xxxxxxx/federationmetadata/2007-06/federationmetadata.xml would be https://login.microsoftonline.com/xxxxxxxx-eeee-4b8a-a886-xxxd4xxxxxxx).

All said and done, it should look something like this:

Having all these steps outlined definitely makes it super simple to restrict access to an azure app service to users in an Office 365 subscription using all new portals!
No comments:
Post a Comment